
Ear defender headphone build
I work in a very noisy open plan office, which makes it hard to focus. To solve the problem, and still let me listen to some music, I made these noise blocking headphones. They’re built from heavy-duty Peltor ear defenders, usually worn in industrial settings to block harmful noise levels from damaging your hearing.
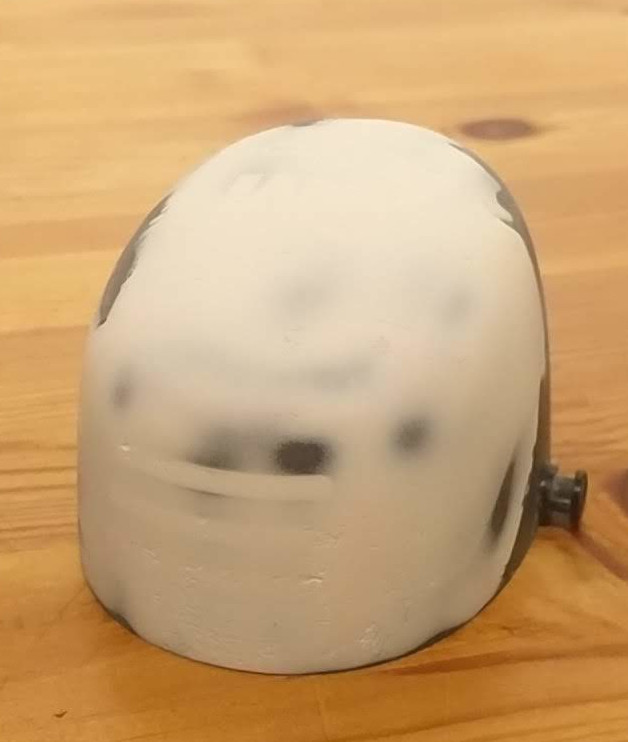
I’d like to show you how I made them, so that you can do the same. Here’s a picture of what they look like:
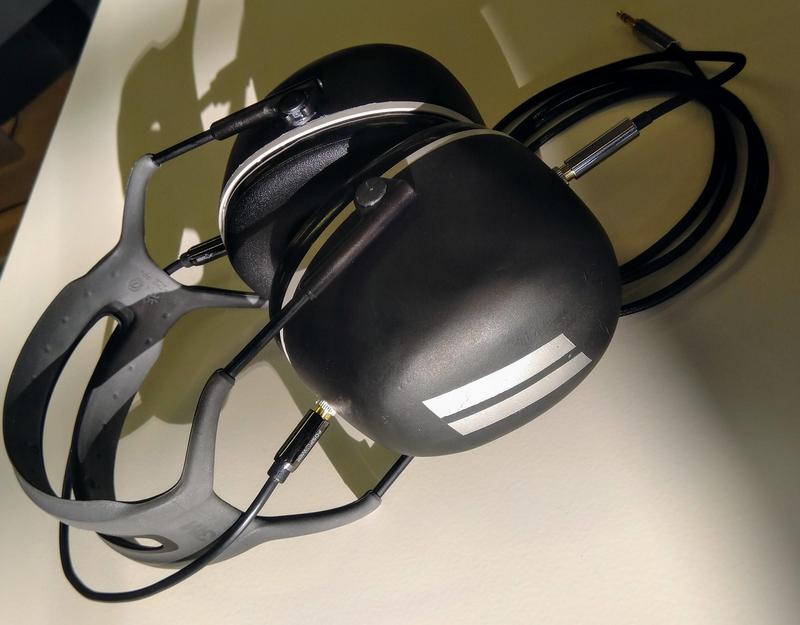
3M Peltor X5 ear defenders have a 37dB noise reduction and are very effective at lowering the volume of the office hubbub. It doesn’t completely eliminate my louder co-worker’s talking however, it just makes it very faint - and without the usual background noise like the ventilation or computer hum. If I add in just a touch of white noise, or music then talking, or ringing phones no longer interrupt my concentration. It’s also nice not to have to switch between ear defenders and headphones if I want some music.
The office noise is so disruptive, and has been for so long, I’ve probably become quite sensitive to it. You might not feel the need for the white noise, but I find it very soothing, and it really helps with my focus. I tend to use one of Mynoise, which has nice natual scenery sounds or Noisli which is very straightforward.
Start of the project
I bought the ear defenders just to deal with the noise. They certainly work, and there are now several co-workers sporting this worksite chic.
As effective as they are, it only took a day before I realized I also wanted some white noise, or music. At an office, the ear defenders also send a bit of an antisocial message. I didn’t want to be quite so unapproachable as they make you look.
I needed to get hold of some headphone speaker drivers, wire them in, and to change the look of the ear defenders.
Prototype
The above photo isn’t how I started. I started by making a prototype. I wasn’t sure it was going to work, so I didn’t want to spend much money or invest time that might not pay off.
I bought the cheapest pair of headphones I could find on Amazon that I thought would work. At the time, that was a 7 GBP pair of red Phillips headphones. I put the innards from them into the ear defenders.
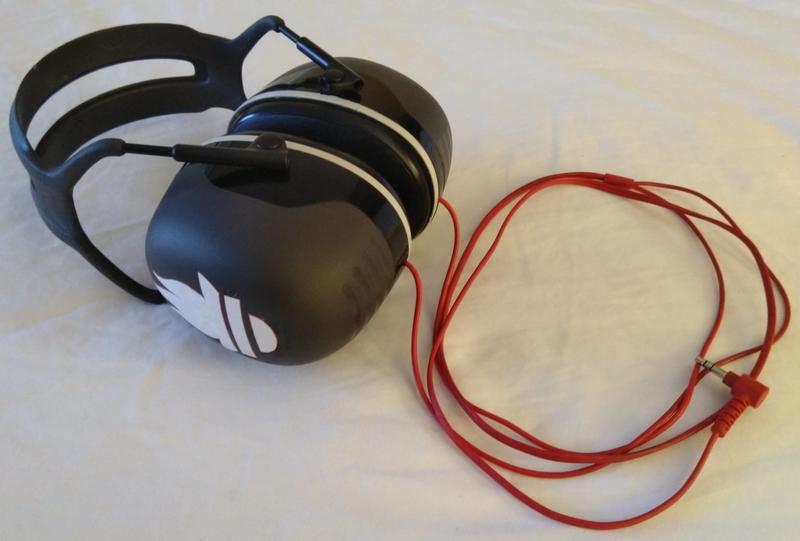
It worked great. I actually used the prototype at work for nearly a year. All I did was to cut out the motif from a Prometheus sticker, and use that to decorate the left ear piece.
I’m still using the prototype version on buses and flights - and they do a marvellous job of blocking out the rumble of the plane engines, or passengers being disruptive. They work so well, instead of re-using the ear defenders for the “real” version, I actually bought a second pair of Peltor X5s so that I can keep a pair at my desk, and a pair to use on the move.
So, if you want - you can just make the prototype version - they work just fine.
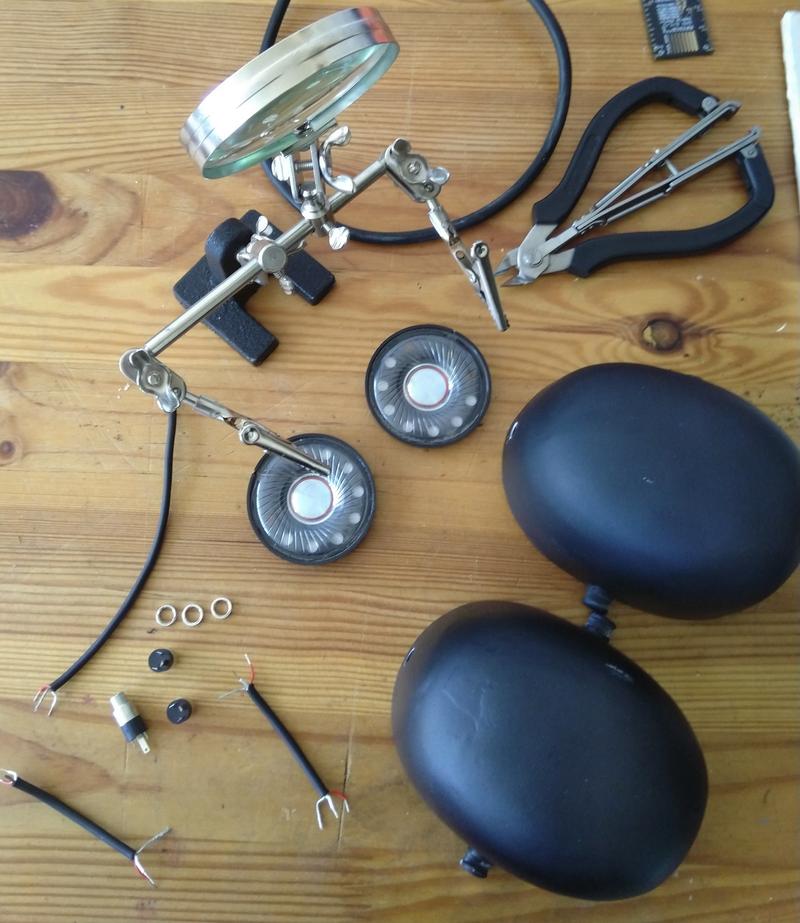
Disassembly
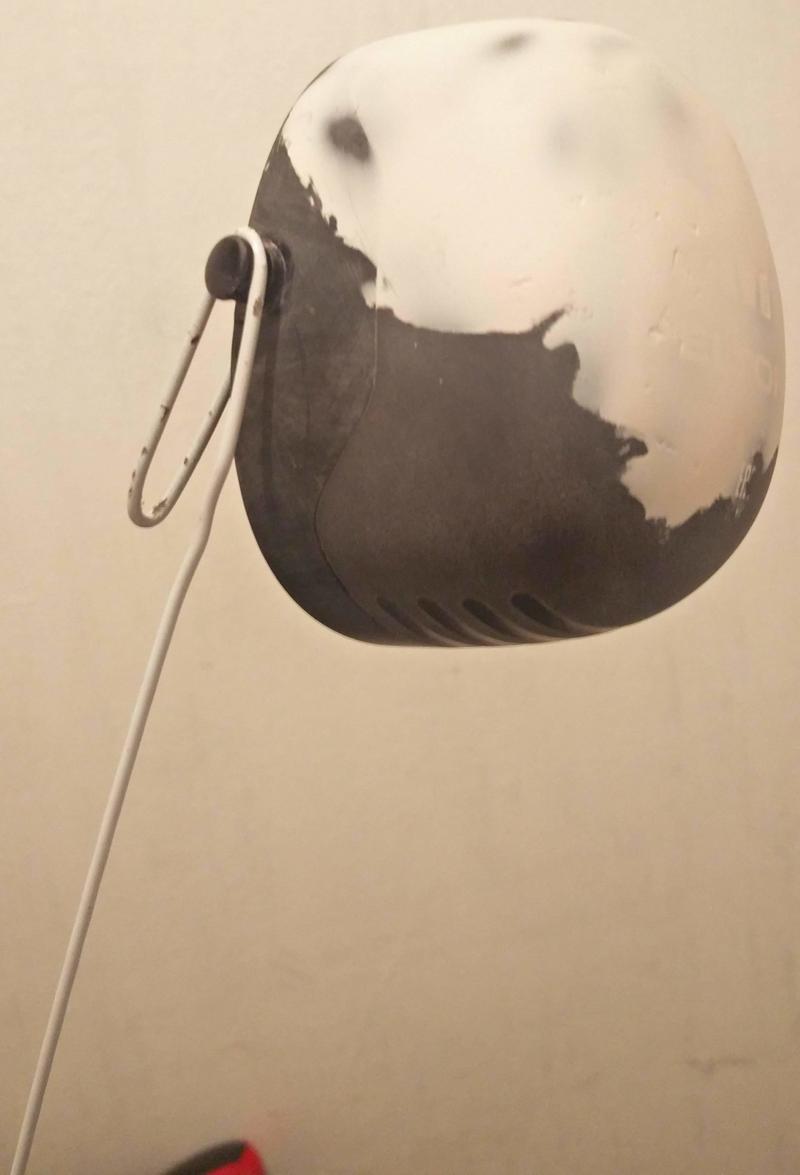
Here’s what the start of that prototyping looks like - I begun taking things apart:
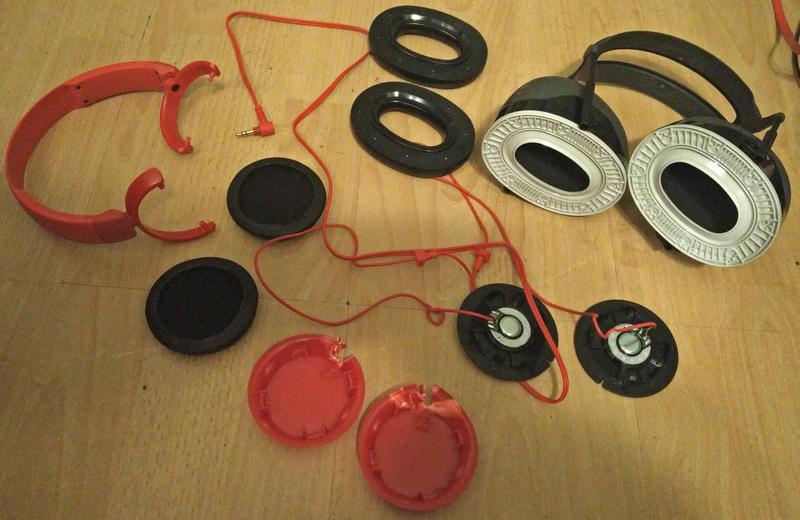
Prototyping really was easy - the ear defenders come apart with a bit (a lot) of force. The white plates come off, and under that is some thick noise isolating foam that is also removable.
The Phillips headphones came apart fairly easily as well. In order to not have to re-solder the wires to the driver, I broke apart the cups. The wires were quite fragile, and I ended up having to re-solder a few joints anyway.
If you’re a little more careful than I was, there is no need for any soldering at all in this project.
I used a Dremel rotary tool with a cutting disc to cut down the plastic around the headphone speaker drivers, making sure to leave enough that I could jam the remains of the plastic plate into the foam to secure the drivers. That worked surprisingly well! You could also easily just use a file, or some pliers to shape the plastic.
I took them to work to test out, and I was very pleased with the result. It also encouraged my coworker to get a pair of ear defenders and start a very similar build.
At first I just put the cables under the ear pads, that worked. Then I cut a notch under the ear muff plates and had the cable coming out fairly sensibly. On the inside of the cup, I knotted the cable and stuck it in place with a blob of hot glue.
Here’s what the finished prototype looks like:
The “real” build.
Having used the first version for a year, that was pretty much a real build - it’s more accurate to call this a “version 2”.
There were a few issues with the prototype, so for version 2:
- I want them to sound good.
- I want the headphones to look better. I want them to look more like real headphones, and less like industrial ear defenders. I particularly want to hide the 3M logo.
- I want a more personalized logo.
The cheap Phillips headphone speaker drivers didn’t sound nearly as bad as you might imagine, but they still didn’t sound good. Before this build, and now at home, I have a pair of AKG 550s, so that is what I compare my very subjective “sounds good” judgement against.
So, I headed online and started looking for where one could buy headphone drivers. Most headphone speaker drivers were quite expensive, but I found some affordable ones on Aliexpress. The seller claimed the drivers had a good response over the audible spectrum, and was of a size I thought would fit into the cups nicely - 50mm wide. Having ordered them, they arrived promptly, well packaged and I could get started with the build.
In fact, thank you to Chitty’s Aliexpress store for great service, product and packaging.
Build Process
Parts list
| Part | Cost |
|---|---|
| Peltor X5 ear defenders | 35.85 |
| 50mm headphone drivers | 9.50 |
| Big Boy body filler | 6.40 |
| 3.5mm panel jacks (10-pack, you need 3) | 6.99 |
| Shielded cable (100m, you need 25cm) | 23.12 |
| 30cm 3.5mm male-male cable | 5.99 |
| 1.5m 3.5mm male-male cable* | 5.59 |
| Silver spray paint | 8.99 |
| Fancy masking tape - “Frog Tape” | 4.90 |
| Total | £107.33 |
* 2-pack, 1.5m and 2.5m - I use the 1.5m at work, but want a longer cable if I should use them elsewhere.
So, not a cheap project! Especially when compared to the £42.85 for the prototype. However, I’ve got 99.75m shielded cable left, spare 3.5mm jacks, silver spray paint, body filler and fancy masking tape for many more projects.
I could definitely have saved money on the 3.5mm cables, but they had just the right look. I also didn’t need 100m of shielded cable, but I wanted to get a stock of the stuff to have for future projects.
Tools and consumables I already had
- Soldering iron
- Side cutters
- Hobby scalpel
- Multimeter
- Dremel (and Dremel drill press, at the office makerspace)
- Solder
- Primer spray paint
- Black ‘chalk board’ spray paint
- Files
- Sandpaper
Build steps
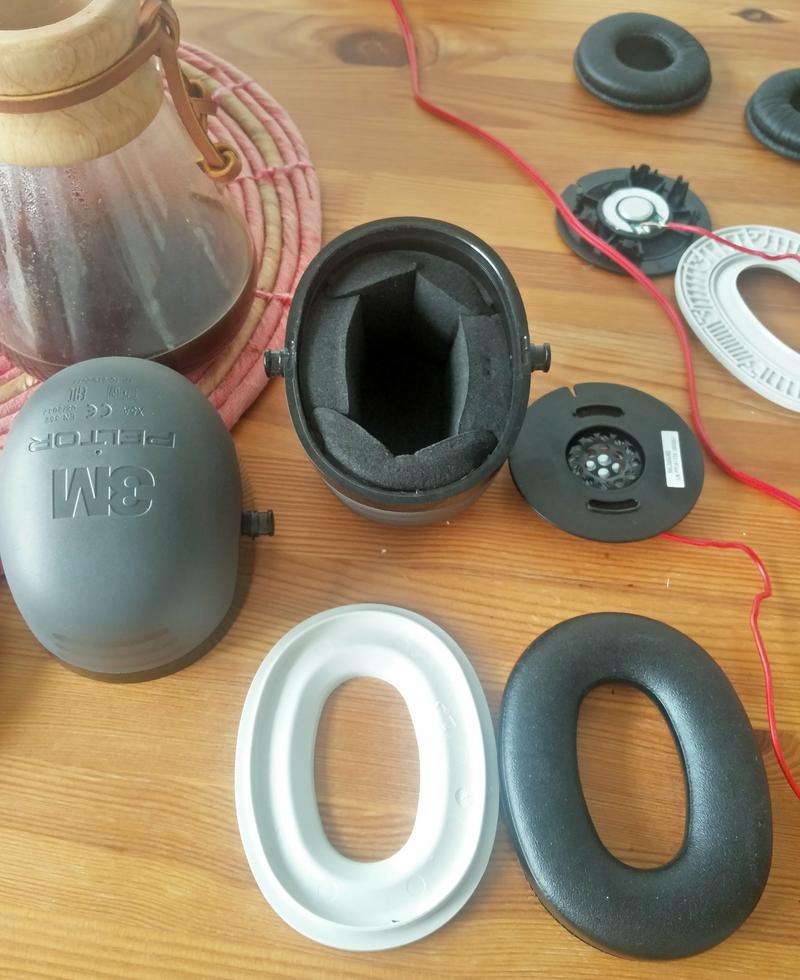
Empty out the ear defender cups
The black acoustic foam had to come out. I also cut some slots into the foam where the 3.5mm jacks and cables would need to go through when I put it back later.
Fill moulded details in ear defender cups
After removing the form, it was time to apply body filler to the headphone cups. I mixed it up, and smoothed it on.
I actually got this wrong twice. I mixed the bodyfiller wrong and it hardened too fast. The second time it didn’t harden at all. Mixing a small amount of bodyfiller can be quite hard, and you don’t have much time to work with it after it’s mixed. I had to spend a significant amount of time with a rasp to get the bodyfiller off. The third time worked fine.
It took a fair amount of filing and sanding to get the finish smooth. The result is worth it though.
Now, when you do this yourself - a few words of warning. The bodyfiller smells very strongly - and you should do this in a well-ventilated area. There’s warnings on the tin, they should definitely be respected. Should the filler not harden - don’t be tempted to put it in the oven to try to dry it out
- that just makes the whole house smell of solvents and doesn’t work. It’s a bad idea, learn from my foolishness.
Painting
I did a test-paint after a small amount of body filler to make sure the paint would stick well. Here’s my little jig that holds the cup while I’m spray painting. It’s made from a clothes-hanger, and hooks over the nubs the headband connect to, and has a loop inside which presses against the inside of the cup.
The paint stuck on well, so I sanded it back, applied the full coat of body filler - and then spray painted it with primer.
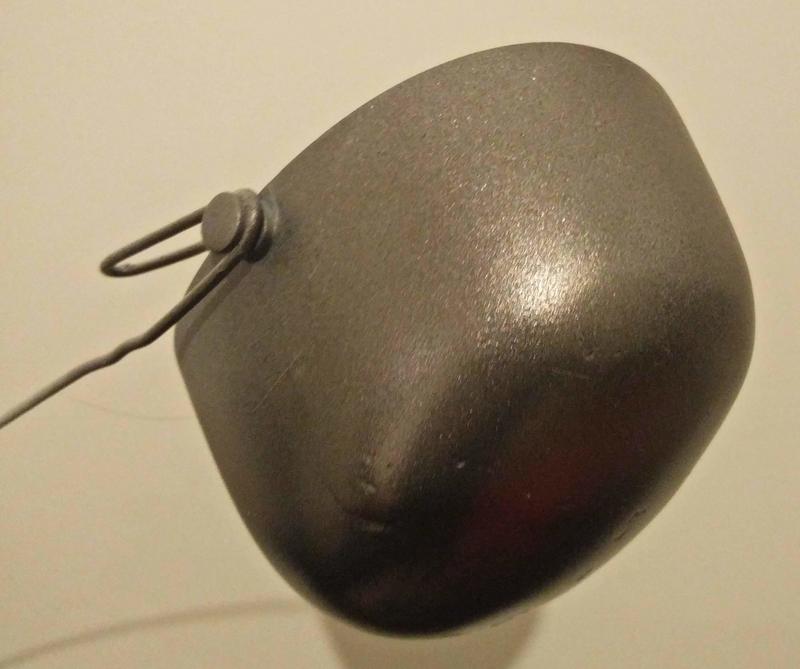
When the primer was dry, I gave the headphone cup a few coats of black paint I had around. It is a matte black blackboard paint which I’ve had plenty of fun with. The paint is still drying in this picture:
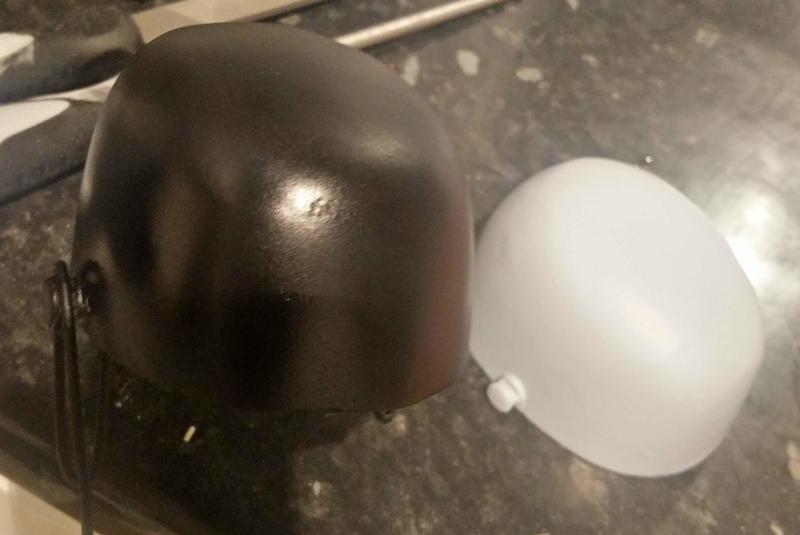
You can also see the second cup, with bodyfiller applied and (mostly) sanded, in the background.
Drilling the holes
I drilled three holes in the cups. Two holes in the left cup - one at the bottom for the connection from the music - and one on top to connect to the right cup. Finally a hole on the top of the right cup for the connection from the left one.
I’m lucky enough that work has let us build a makerspace. The makerspace has a Dremel drill press, which made it really easy to get the holes done right. I used the Dremel drill press to put in pilot holes, then measured the width of the 3.5mm jacks I ordered - and widened the holes to fit. I used the Dremel again for the widening, with a drum-shaped abrasive bit.
Wiring
I measured out and cut some lengths of two-conductor wire. One to connect the left channel to the left cup’s speaker driver, a second to connect the right channel to the top 3.5mm jack. Then finally a length to connect the right cup’s jack to that speaker driver. See this diagram:

A little soldering later, and I could put the sound blocking foam back and insert the drivers so that they’re held in place by the foam.
Detailing
I used masking tape to mask off a logo and spray paint on a silver “//” to give it a personal touch. I cut the tape into shape with a hobby scalpel when needed.
I bought a brand of fancy masking tape called “Frog Tape” from Wickes to get a nice, sharp edge to the logo. It worked really well, and I’d recommend a fancier masking tape over the usual stuff.
Result
I think they look good. They also sound great!

They fulfill their original purpose and block out the office noise to let me concentrate at work. At the same time, they give me the chance to add some white noise or sweet tunes!
I think my co-workers appreciate that I look more approachable, I love how they sound, and I like that they feel personalized for myself.
It’s not a hard build - a few steps are time-consuming, like the sanding, but
not difficult. If you decide to build some yourself - I’d love to see what
you’ve made - please ping me on twitter, where I’m @anglerud.
If you think someone else might be interested in a build like this, please share a link to this with them.
Next
There is one more thing I’d like to do with these headphones. But, since it took me a year between finishing the prototype and making the finished headphones, it could be a while before I get around to it.
The makerspace at work has a sewing machine! Almost certainly one of the most useful things we got. I’m going to make some covers for the headband to make them slightly more comfortable, and hide more of the ear defender look.
I’ll need to find some suitable fabric and padding. I have some torn black jeans I might use - not sure about the padding yet though.