
Dogear - The Algorithmic Bookmark Project
My Dogear project is software that I use to create one-of-a-kind generative art bookmarks. Every edition of a book gets its own unique design, like a fingerprint. The bookmark belongs to the book as much as the book belongs to you.
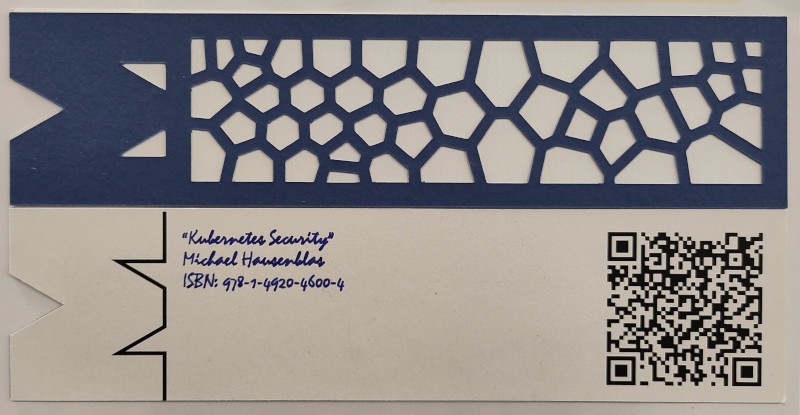
Front and back of two bookmarks as an example:
I absolutely love how this project has turned out, but along the way I learned to dislike the Cricut Design Studio software greatly - and you can read about my Cricut Woes in a companion post to this one.
Why?
The idea came to me when I needed a bookmark for a book I was reading in the company makerspace. I had been looking for a project that let me use our our new Cricut Maker 3, so my first instinct was to cut a rectangle out of cardboard and call it a day.
I was however instantly nerd sniped by my coworkers. The idea took shape, then escalated quickly. Why didn’t every book come with its own bookmark? Why wasn’t that bookmark obviously for that particular book? Scope didn’t creep, it sprinted.
Soon it wasn’t just a paper rectangle, but:
- a custom outline
- a decorative top
- an algorimically generated Voronoi front design
- pen-plotted text
- a QR code
- a web page per bookmark
Much of this would exercise the makespace’s new tool, and give me experience in really using it rather than just demoing the basics. At the same time, this project’s generative art aspect would let me write software in Rust, my new programming bestie.
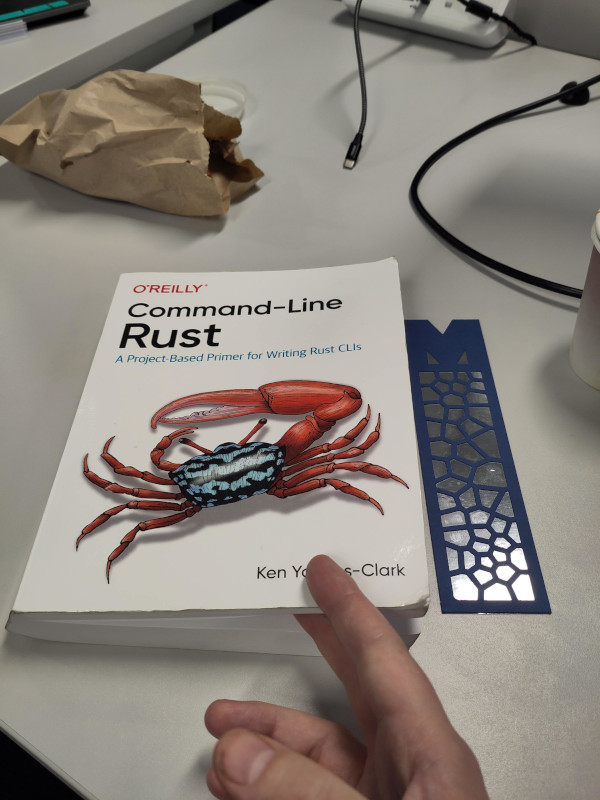
To relieve the tension - let me reveal that the project went well. Here’s the project coming full circle, and I’ve cut the bookmark for the book that triggered this whole project:
I decided to make bookmarks not just for myself, but for the small tech library that we have on the same floor. There’s about a 130 books in the library, so it felt like a large, but still approachable project. I underestimated the time it would take to make each bookmark by quite a bit, and the time from start to finish of the project by a huge amount.
I settled on “Dogear” as a name for the project — a nod to the risk of page-folding I wanted to avoid.
The design
Below are the four SVG files that make up a bookmark.


From left to right:
- A front layer with a cut-out Voronoi diagram and logo detail, cut from thick coloured card.
- A mid-layer in a contrasting color, for stiffness and visual pop. This layer is cut to match the company’s M logo on the top.
- A print layer with a QR code and a visually balancing line design, laser printed on plain printer paper.
- A back layer with the author, title and ISBN pen-plotted.
I chose artist-grade colored card for the front design. It’s thick (300gsm) and has a pleasing, premium, feel when touched. Similarly, the mid layer is also thick paper (slightly less thick at 180gsm, and thus also less expensive). The extra rigidity makes the bookmark much more robust and adds to the impression of a well-made item.
The mid-layer’s contrasting color is important to emphasise the front layer’s Voronoi design, the true centrepiece.
The two back SVG layers create one physical artifact. The pen plotted book information is done on the same paper as the print layer with the QR code. The two layers have to be aligned precisely, or the visual design gets thrown off very easily (or worse, the design gets cut off by the edge of the bookmark).
The software
The Dogear software suite has three binaries book_sniffer, dogear, and
bundler. They’re run like this:
$ book_sniffer list newly_scanned_isbns.txt
$ just generate  # runs `dogear` on every .ron file in the `new` directory.
$ bundler --orientation=landscape <name> bookmark_dir_1 bookmark_dir_2 ...
$ just upload    # triggers rsync on the `new` and `static` dirs.
This could be simplified further, but I’m happy enough with this for now.
This pipeline fetches the metadata I need for each book, generates the design files for each bookmark, then prepares a set of five to be made.
Dogear is written in Rust, which I’ve been learning and thoroughly enjoying. A large part of the motivation for this project was to learn Rust by having a practical project to motivate me.
book_sniffer
book_sniffer turns a list of ISBNs into everything the rest of the pipeline needs:
- Fetches book info (title, authors, identifiers) from Open Library.
- Outputs a RON file to regenerate the bookmark at any time.
- Builds the HTML index page using Tera templates.
I scanned books with the Alpha ISBN Scanner app. It’s simple, and fast. I had to filter out a few barcodes by eye as I occasionally scanned non-ISBN barcodes. In the future, I might add a software verification step that keeps only genuine ISBNs.
dogear
dogear draws the generative art, and produces all the layers in a bookmark.
- Generates the outline and top decoration with the SVG crate.
- Draws the main design Voronoi diagram with the Voronoice crate.
- Outputs the mid-layer outline, again with the SVG crate.
- Makes a QR code with the qrcode crate.
- Lays out the back layer text, with the Mistral font.
The Cricut requires text be rendered as SVG curves instead of text. I use Cosmic-text for this. The ISBNs on the back layer are formatted properly and pleasingly with the ISBN crate. To rotate, size and reposition the text, I use Zeno.
bundler
Bundler places multiple bookmarks on each A4 page. It makes optimal use of the paper and prevents a lot of manual work importing SVGs and laying out cuts.
A significant amount of the time making a bookmark is spent uploading the images to the Cricut cloud. By bundling five bookmarks onto a page, we cut that time sink to just a fifth of the time.
The bundler also contains some smarts that works around Cricut Design studio bugs relating to scaling, and the margins it inserts where they’re not expected.
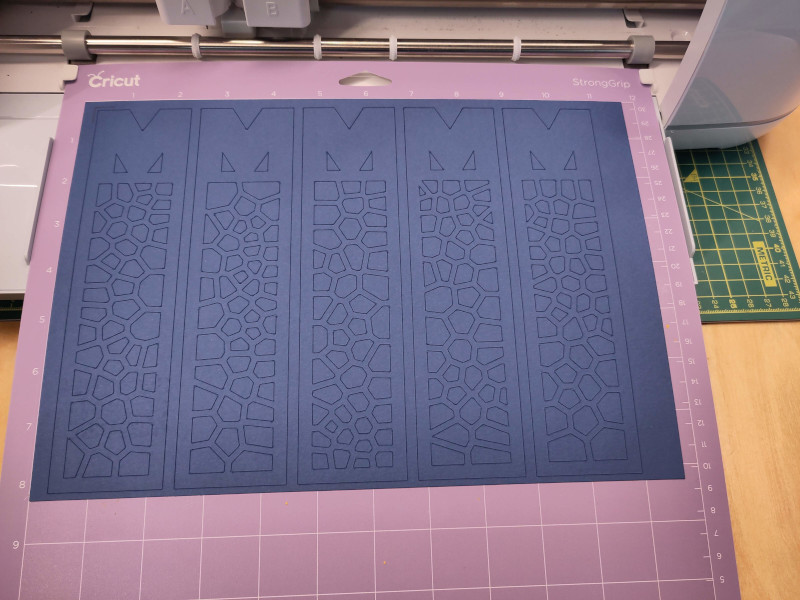
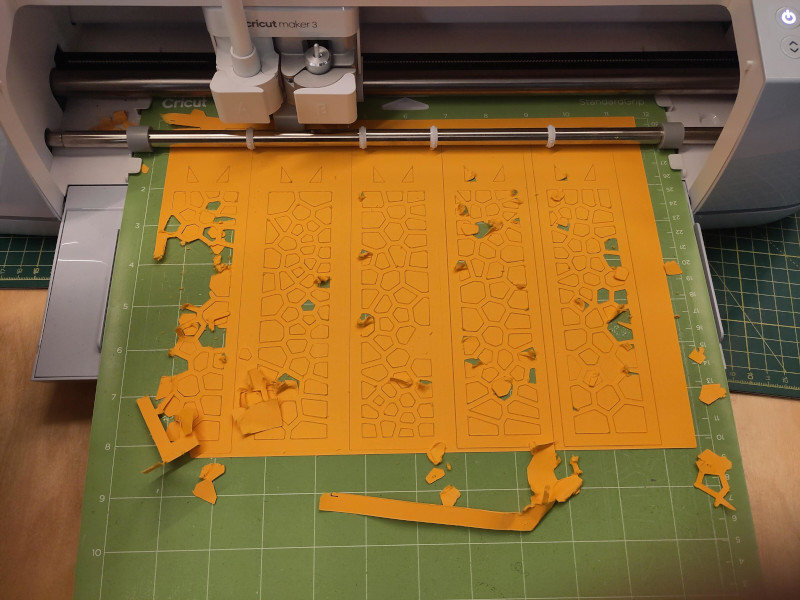
The results of the bundling process is a cut page that looks like this (for the front design, there’s three more):
Software used
I’ve referenced the libraries I used throughout the article - but they’ve been so critical, I’d like to list them out again to highlight them:
- Cosmic-text turns text into SVG curves. It’s by Pop!_OS and Jeremy Soller.
- ISBN by Jihyeok Seo (limeburst) to format ISBNs pleasingly.
- QR code to make QR codes, by Kennytm.
- SVG to deal with all SVG, by Ivan Ukhov.
- Voronoice to generate the Voronoi diagrams, by Andre Esteve.
- Zeno by Chad Brokaw (dfrg) for vector maths.
In addition to these key crates, a whole ecosystem of Rust crates helped make Dogear happen:
- Anyhow ¯_(°ペ)_/¯ by David Tolnay for ergonomic error handling.
- Clap for command-line parsing.
- Nix(by the nix-rust team) and Permissions by João Marcos to deal with filesystem permissions on Linux.
- Rand for randomness.
- Reqwest by Sean McArthur for HTTP requests.
- Serde plus Ron for reading and writing the bookmark data.
- Unicode-ellipsis by Clement Tsang for gracefully truncating Unicode strings.
Cut, print, and plot
The physical assembly is simple, but time consuming. For every layer generated by the bundler I have to go through a number of small steps. The cut itself dominates the overall time, but there’s a reasonable amount of interactive prep time as well that means a lunchtime is really only long enough to cut one set of five bookmarks if I also want to eat some lunch.
First I print the QR code and back design sheet. Then for each of the front design sheet, mid-layer, and back:
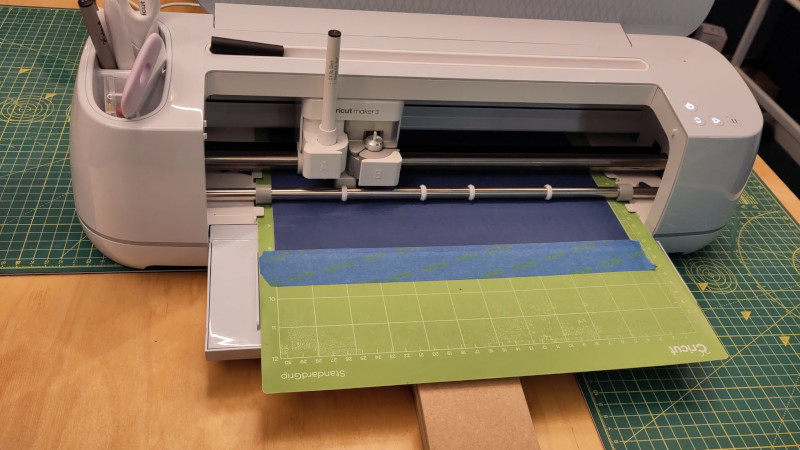
- Place the sheet on to the correct cutting mat (light grip for the back, medium grip for ther others).
- Apply tape to the edges to supplement the stickyness of the cutting mat.
- Select the correct drag knife and load it into the machine (the drag knife with the yellow safety cover for copy paper, red for card).
- Load a pen into the second toolholder (if needed).
- Trigger the cut (it takes about 15 minutes for the plot, 10 minutes for the front design).
- Peel the page off the cutting mat, and start “weeding”. A tool like a dental pick is used to get rid of details that didn’t quite cut all the way through. Sometimes a scalpel is needed to do a bit more work.
- Clean the cutting mat - lots of offcuts get scraped off.
Getting the Cricut to consistently cut cleanly is a bit of a battle. If the cut goes well, then the Cricut makes quick work of the intricate cuts for the Voronoi patterns, and they really do translate beautifully to paper. For a good cut, perhaps a little “weeding” is needed to clear stray pieces, but it’s manageable.
If all I’d cut was one sheet (5 bookmarks), this would have been very easy. However, dealing with the Cricut’s foibles was a major challenge over the 130+ bookmarks that were manufactured.
There was a long process of experimentation to work out the correct drag knife to use with what thickness of card and paper, what cutting mat to use, and how to deal with the cutting mat degrading between cuts.
I use three different paper weights:
- 300gsm for the front design
- 200gsm for the mid layer
- 80gsm regular copy paper for the back (or whatever’s in the office printer that day)
I need to use two different cutting mats. Light grip for copy paper, medium grip for both of the card sheets.
The light grip is too weak to hold the card layers. The medium grip is actually too sticky by default and will ruin the card when pulled off – so I had to degrade the surface intentionally to make it work. Eventually the grip degraded sufficiently through use that tape was required to hold it down fully - but that was easy and reliable, so I wasn’t unhappy with that situation.
There were a lot of combinations to try, and many cuts turned out like this:
I had far fewer failures towards the end of the project, but it was still not entirely smooth sailing. Here’s the first five bookmarks I successfully assembled for the work tech library:
QR code rectangles
Using filled polygon shapes did not work to plot the QR code. The Cricut software did not attempt to fill, as instructed - instead it would just draw the outlines. As it was drawing on the border of each pixel square, it was also enlarging the squares by half the width of the pen - making the black squares too large, and the white ones too small. This made the QR code not scan.
I tried a few different SVG approaches, none actually got cut as displayed by the Cricut.
So now I have a layer that is printed on a regular printer instead. Only the writing itself is pen plotted. This is the reason why I have the third sheet of copy paper rather than plotting the design straight onto what is now the mid-layer. The crispness of the print works out much better than plotting for QR codes anyway.
Cricut Fonts
You can read about by problems with Cricut’s font handling in the Cricut Woes post. The TL;DR is that fonts are hard, and I generate curves from the font data.
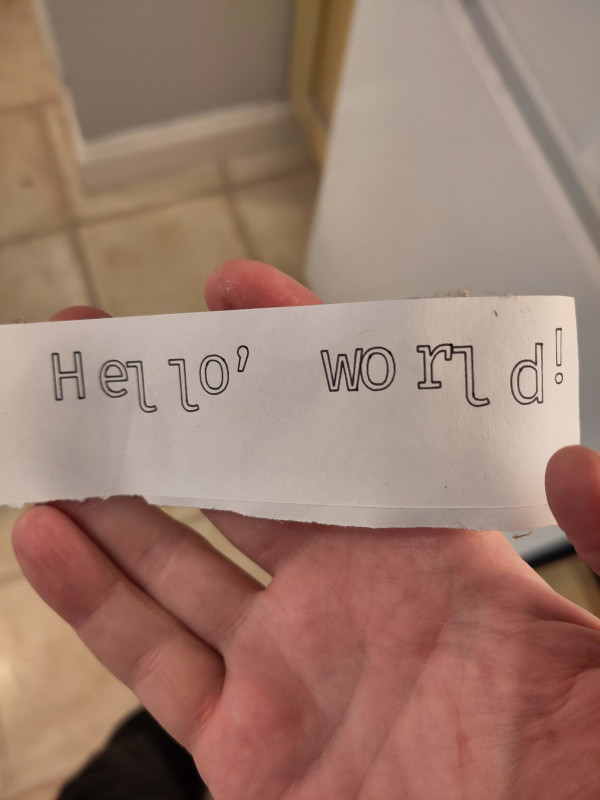
There’s a lot to know about fonts. My first try shows all the things I didn’t know about text rendering, like layout, kerning etc. Behold, my wonderfully wonky first attempt that the Cricut would actually plot:
Bugs in libraries
At the time I implemented the back layer text rendering, Cosmic-text had a bug/misfeature where it didn’t actually match on the font family properly. This seems to have been fixed, but what I did at the time was to create a Fontdb system with only one statically bundled font, so the only thing that could be selected and found was what I wanted. Here’s the bug I was working around:
- Cosmic-text issue 386 - the bug.
- Cosmic-text PR 399 - their fix.
It certainly wasn’t the only bug I found during this project, but it was one that caused me a significant amount of head-scratching.
The benefit of my workaround is that I don’t have to worry about what fonts are installed on the system - the font is embedded in the actual binary. While there was that bug (now fixed), the Cosmic text library is fantastic. It’s so easy to use!
Polygon shrinking
This was quite a rabbit-hole.
My voronoi diagrams are made up of a bunch of closed polygons. Of course, in order to be able to cut the patterns, the polygons can’t share borders or overlap - or the entire design will just fall out of the cut sheet.
My first thought was to just make the lines thicker. Here’s how that looks (the scaling isn’t right as I didn’t save any of my first attempts, so this is a re-creation):

However, while that looks fine, including in the cricut software, the Cricut will actually just cut down the middle of the lines! That makes the cuts complete nonsense. The entire design is just left on the sticky mat, and the bookmark now contains a laboriously created rectangular cutout where the design was supposed to be.
This is one of many, many ways the Cricut Design Studio is terrible. If it doesn’t support line widths, why does it display as if it does?
What’s the solution? I went with shrinking the polygons, thus leaving a gap between them. That meant going back to my software, and producing different geometry. Here’s how it ends up looking:

It took me quite a while to get this right. Shrinking polygons is harder than it first seems for a variety of reasons. I started using the polygon offsetting crate (which is very good), but it doesn’t shrink polygons through corner cases like edges needing to be removed.
I ended up using Google Jules to write an algorithm for this project. While it seemed to be going well initially, actually getting the results reliable was almost certainly a slower and more laborious process than writing it myself.
It would be nice to go back to the polygon offsetting library and to contribute a change back upstream, but I need a break from this project before taking that on. The author kindly suggested some ways to approach the project for the library.
Vector maths with Zeno
I have offered a contribution to the Zeno library as its vector translation was broken. At the moment I’m using my own fork that contains the fix.
Fonts, the good bits
I am really pleased with the Mistral font choice to soften the design, which otherwise is a little angular and spiky.
margins and scaling
The Cricut Design Studio has many flaws as I’ve documented in my Cricut Woes blog post. It’s hard to convince it to cut things at the correct size, and it inserts surprise margins.
The laser printer of course also does not print exactly where it claims either. It’s only distorted by a very small bit, thankfully. For now, I’ve inserted a fudge factor into the bundler to compensate, but a more correct way to do this would be to generate a calibration image, measure the actual printout, then transform the bundled cut-page to compensate.
Assembly
Assembling the bookmarks from the three separate physical layers is equal parts spray glue and patience.
All three layers get attached with spray glue. Accurately lining up three intentionally very sticky, floppy paper shapes freehand is nobody’s idea of fun, so I used OpenSCAD to design a 3d-printed jig.

I apply spray glue to all 15 individual elements in a batch of 5 bookmarks. This takes just the right amount of time that the glue has become the correct amount of tacky by the time I start aligning the first pieces in the jig.
It takes some time for the glue to fully set, and the drying can cause the bookmarks to warp. To stop that happening, I made a press out of a cheap silicon mat and some MDF that I cut with a multitool. I put two bookmarks between each press surface, then use small clamps to press the whole thing while drying.
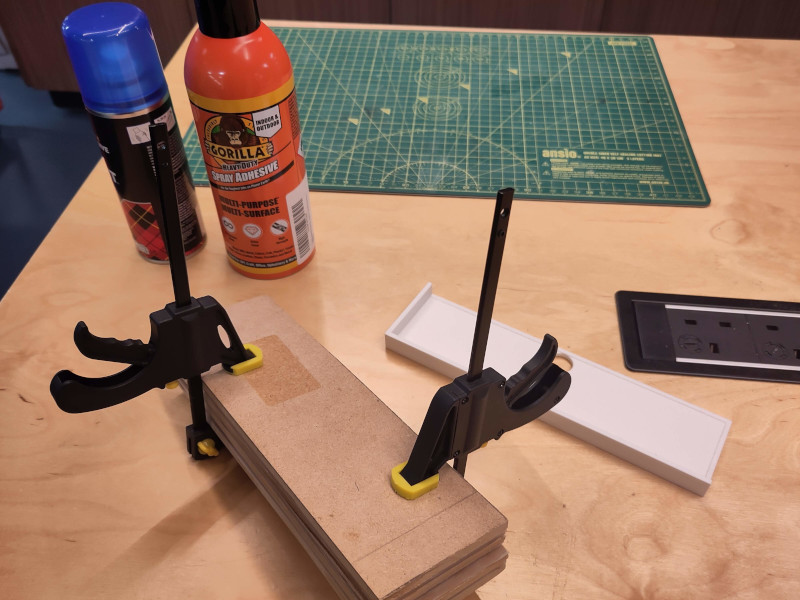
I use 3m spray fix for the mid layer and back layer because it’s cheap, then the better Gorilla spray glue for the front design.
Per-bookmark html pages
The QR codes on the back of the bookmarks link to pages specifically for that bookmark. On those pages you can download the SVG files that make up the bookmark, and it also displays the metadata about the book.
In addition to a page per bookmark, I also generate a little micro-site specific to that run of bookmarks. So the Man Group bookmarks get a little site to themselves that talk about why the specific design was chosen for them. When other people get their own design, they’ll get their own micro-sites as well.
All the html is generated by the book_sniffer and is done with Rust and some
Tera templating.
Open Library
Learning about the Open Library project during this project was an unexpected delight. It is yet another fantastic resource provided by the Internet Archive. The APIs to get book metadata are free to use, and very easy to code with.
Out of the roughly 130 books I scanned, I only had to add five to their collection - which was very easy. We had a few donated books which were Indian subcontinent editions that were not yet in the Open Library collection for example.
I enjoyed my tiny contribution to such a valuable project.
Am I happy with the result?
Absolutely. After having cut over 130 bookmarks over the course of many lunchtime sessions in the Makerspace - the results look great. Along the way, I’ve had fun learning Rust, exploring crates, and building a system that bridges books, maths, and craft.
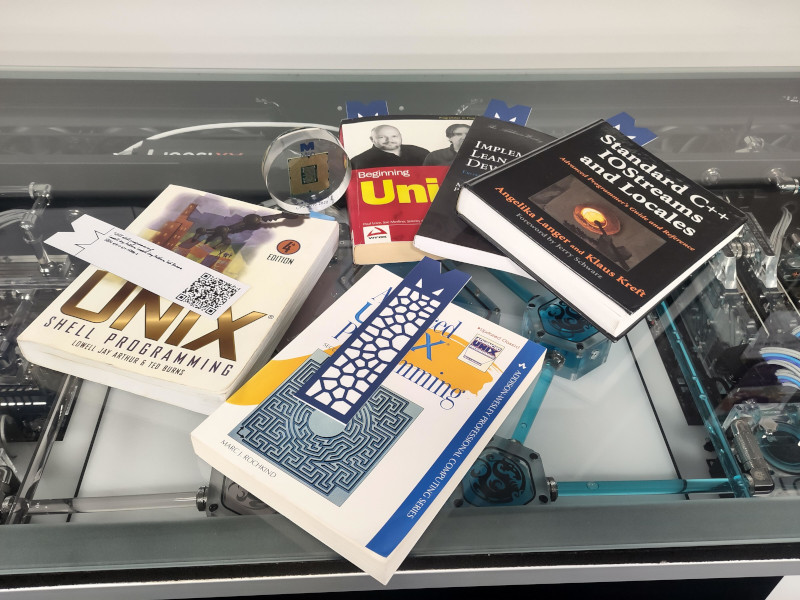
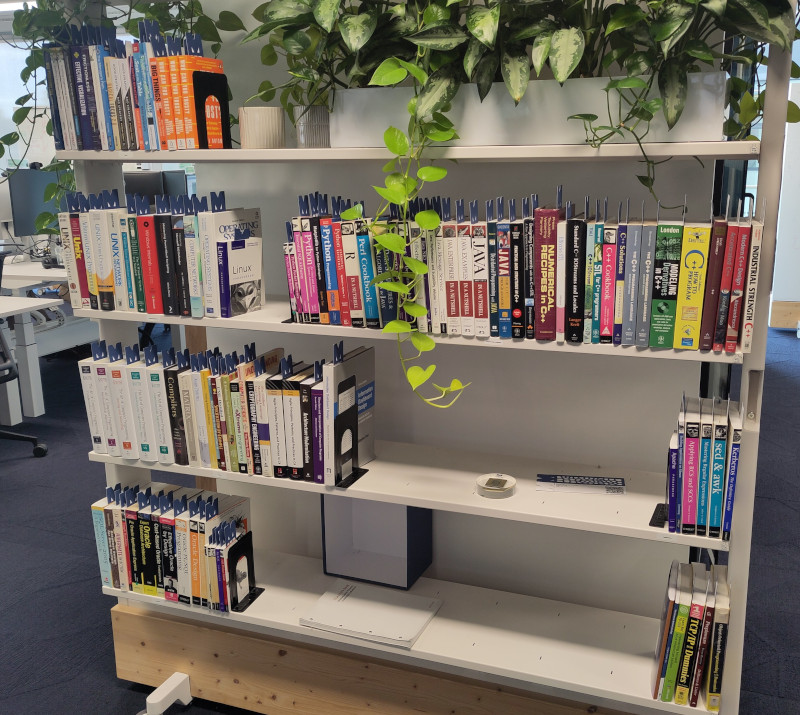
The work bookshelf with all the bookmarks cut looks very appealing.
I’m eager to make a batch for my own library at home - and I’ll be working on a new generative art design for that!
Finally, the best part of this whole project was delivering a custom bookmark together with a nice Folio Society book to my partner as a birthday gift. I loved being able to give something unique and personalized.